Friday, July 29, 2011

Galley™ news: The Galley™ is featured in the Make-A-Wish Foundation® Home of Oklahoma


The Galley™ is featured in the Make-A-Wish Foundation® Home of Oklahoma, and will be open for tour this weekend, July 29-31.  The home will be open from noon til 5:00 pm Friday, Saturday and Sunday.

Make-A-Wish Foundation® of Oklahoma will receive all proceeds from tour ticket sales. Patrons may tour the home for a $10 admission fee, or they may purchase discount tickets for $8 at Mathis Brothers and Rooms Today.

Stop in and see the the Galley™!  

Stone Canyon in Owasso 
17934 Anthem Ridge Rd.
Owasso, OK 74055  

For more information, click here.       

Directions: Take 169 North then Exit 76 Street North, and go east 4 miles. Turn right on 177 East Avenue which is the entry to Stone Canyon. Stay on road past 3 stop signs, then turn left on Patriot Drive. Go past gate house & take the first right on Anthem Ridge. Concept Home is the first home on the left.

Thursday, July 28, 2011

Galley™ news: New 4' ft Galley™ installed at Metro Appliances & More-Tulsa

New 4' ft Galley™ at Metro Appliances & More-Tulsa! You can see it at the Tulsa location (5313 South Mingo). Hardware and 7' Galley™ Rack coming soon. Stay tuned for more updates!!

Thursday, July 21, 2011

Searing Steak on Induction


Rib-eye Steaks set out to become room temperature
After steaks are room temperature, season the steaks with salt, pepper and oil.
Set Induction cooktop to 500° degrees with a cast iron pan.


When the cast iron pan has become properly heated, you're ready to cook the steaks. The Induction cooktop did not produce the typical amount of heat it takes to bring up to 500° degrees on a gas or electric stove. On gas or electric that would take up to 15-20 minutes! Using induction, there was NO extra heat in the kitchen, and in roughly 3 minutes the pan was 500° degrees!! 
Placed on a heated plate to 200° degrees, that was drizzled with drawn butter.
Steak was also topped with drawn butter.

Wednesday, July 20, 2011

New 7' Apron Front Galley!

This 7' apron front Galley was put to the true test for this homeowner when she canned home made salsa this week using a portable induction burner right at the Galley.  We received this email from her: "I've got a garden and have been doing a lot of canning. Yesterday was salsa day. It was fabulous! Super efficient, all of the mess was contained and I didn’t destroy the entire kitchen, which is really easy for me to do with a project like that."
Some apron front Galleys have wood trim below; this one has granite for a continuous look.
This island is 7' wide and 11' long.  There is a gas cook top around the corner from the Galley, but most of their cooking is done using portable induction burners right at the Galley.

Tuesday, July 19, 2011

Canning At The Galley!


A few Galley owners tell us about their experience this weekend with canning at their Galley: 

This weekend we visited a Galley owner's home, and as soon as she saw me she turned and said, "Roger, I want to give you a big Galley hug for inventing this sink. This is the most incredible sink I've ever worked with. I've canned all my life, and doing it on the Galley has saved 3 hours of work!"

"
Roger, I just had to tell you about my latest adventure with my Galley.  I’ve got a garden and I’ve been doing a lot of canning.   Yesterday was salsa day…

Left to right on the sink I had:
·         Induction burner with my boiling water for blanching the tomatoes for peeling
·         Large bowl with ice water for dunking after the blanch
·         Colander bowl for trash – peels and cores
·         Cutting board for chopping

·         Large pot for canning prep


I've got a garden and have been doing a lot of canning. Yesterday was salsa day. It was fabulous! Super efficient, all of the mess was contained and I didn’t destroy the entire kitchen, which is really easy for me to do with a project like that."

We are continually hearing stories of how people are finding new ways to use the Galley and all of it's function!


Friday, July 15, 2011

A few tips for taking care of your Galley and Accessories

A few tips for taking care of your  
Galley and Accessories!
bamboo 
Bamboo Cutting Board Care

Using mineral oil & camellia oil:

Apply mineral oil to bamboo cutting boards before using for the first time (yours has already had one coat applied), and at least once per month thereafter. This will preserve the beauty of the wood. Heat mineral oil gently on low heat, and then apply oil to the surface of the bamboo cutting board with a cotton cloth. Rub in thoroughly and allow the oil to soak for 20 minutes before wiping excess away with a dry cloth.

Wipe the surface of bamboo cutting boards with camellia oil (also known as tea seed oil) periodically. This oil will preserve the luster, and bring out the attractive grain of the wood. This is not necessary for performance, but will enhance aesthetic appeal.

cutting board 
White Cutting Board Care    


Bleach solution is best for disinfecting cutting boards. We always advised to cut raw meat on separate cutting boards from cooked meat, vegetables or other foods.


We are aware that cutting marks appear in the boards, and sanding is not recommended. If you'd like to have the brand new look when company's coming over, additional boards can be purchased to have on hand for such occasions.

Galley    
Renewing the Angel-hair Finish   

After a long week of demonstrating the Galley at a Parade of Homes recently, we noticed slight scratch marks on the angel-hair finish where we had been sliding the Galley divider. We used an orbital sander with 120-grit sandpaper to remove the scratches. In less than 5 minutes it was as good as new!  


Thursday, July 14, 2011

Outdoor Paradise

The homeowner was nearly finished building his outdoor kitchen when he discovered the Galley. The space they had planned for the sink ended up being the perfect size for the 7' Galley. We installed an apron front with the apron being made of the same wood as the beams.

The space under the sink was already allotted for the drawers and stainless steel cabinets. They now fit perfectly under the Galley.

This is the wood that was used for the beams, so we used more of the same for the apron front of the Galley.

What you can't see here is the seating area on the other side of the wall... IN the pool!

There is a beverage center on each side of the Galley.

Notice the Galley Dome over the Condiment pallet.

The island houses a microwave, an ice-maker and a warmer.

Fully furnished cook center that includes a Kitchen Aid grill, a wok cooktop, a refrigerator, and plenty of storage beneath.

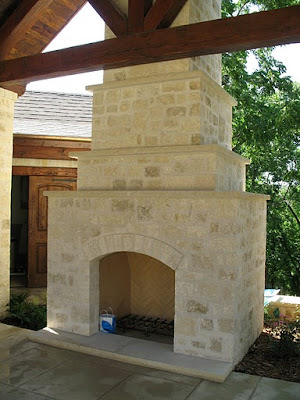
Every outdoor kitchen should be complete with a fireplace like this.


You can see here how the apron front compliments the beams and ceiling.

On the 7' Galley, even with 3 components on the tiers there's still space for both faucets to be in use.

Poised and ready for action.

Friday, July 1, 2011

Galley News: Family trip to pick-up the Galley!

Yesterday afternoon a couple from Stroud, Oklahoma came to pick up their 7' Under-Mount Galley.  Their daughter was so excited she wanted to come along with them to pick it up! Once again we see that the Galley is perfect for the whole family.